
Now You Need To Maintain It
by george wehrung, LOBO instructor
The focus of this article is Lancair Maintenance Knowledge and Resources applicable to the following subjects:
- Maintaining your new-to-you airplane
- Tools required
- Hardware—everyday hardware vs. expensive Aviation GradeTM hardware
- Logbooks—keep detailed records and make the entries, make the entries, and make the entries
- Flying tool & spares kit
Maintenance
There are a number of reasons pilots purchase Lancair aircraft, including sexy looks, blistering performance (or bang for your buck), fewer roadblocks to modifications, and saving on maintenance costs. This article will focus on the maintenance side of the equation. The first thing we should discuss is authorization. Can you perform maintenance on your aircraft? As a private pilot, you already know you may perform a variety of typical preventive maintenance tasks, even on certificated aircraft. But major repairs and the annual inspection for certificated aircraft usually require an FAA-certificated maintenance technician. The same is not true for experimental aircraft. Except for the condition inspection, there are no restrictions on who may perform maintenance on experimental aircraft.
Condition Inspection
What is a condition inspection? It's the same thing as an annual inspection performed on certified aircraft. The FAA requires an individual hold an Airframe & Powerplant certificate with Inspection Authority (A&P/IA) to sign off annual inspections on certificated aircraft. Authority to sign off a condition inspection also requires a certificated mechanic, either an A&P or an individual holding an FAA Repairman’s Certificate (see §65.104 of the Federal Aviation Regulations for more information about the repairman's certificate) for the aircraft in question. A repairman's certificate applies only to the original builder(s) of a single aircraft. That means unless you can prove to the FAA you were involved in building your aircraft AND obtain a repairman's certificate, you must rely on a certificated A&P mechanic to sign off the condition inspection, although paradoxically they do not need to have inspection authority to sign off the inspection. Go figure.
The previous paragraph contrasts the condition inspection required for experimental aircraft to the annual inspection required for certified aircraft. There’s another inspection you might know about called the 100-hour inspection. 100-hour inspections generally apply to certified aircraft used for hire, but they also apply to any aircraft—including experimentals—used for flight instruction. If you use your experimental aircraft to provide flight instruction under an FAA Letter of Deviation Authority (LODA) you are required to perform inspections at 100-hour intervals. This would be the same as a condition inspection, but performed each 100 hours of flight time.
NOTE: You may exceed the 100-hour inspection interval by up to ten hours if you need to fly the aircraft to another location to perform the inspection, but that time must be included in computing the next interval.
So now you know that except for the condition inspection you can perform any maintenance you want; there are no limitations in the FARs. Should you? I would caution that you honestly gauge your competence to do so. The safest bet, and my recommendation, is that you not attempt any maintenance task you have not performed previously under the supervision of an A&P mechanic.
Guidance
There is a plethora of "how to" information floating around the interwebs. The first items on my recommended reading list would be the following FAA documents (note these are large PDF files that may take some time to download):
- FAA-H-8083-30A, Aviaton Maintenance Technician General Handbook
- AC43.13-1B, Acceptable Methods, Techniques, and Practices - Aircraft Inspection and Repair
- AC43.13-2B, Acceptable Methods, Techniques, and Practices - Aircraft Alterations
The AMT General Handbook contains information on mathematics, aircraft drawings, weight and balance, aircraft materials, processes and tools, physics, electricity, inspection, and ground operations, while Advisory Circulars 43.13-1B/2B comprise the mechanic's bible describing acceptable methods for how to actually do things. For more reading there are four additional volumes in the series of handbooks for technicians you can download by clicking here.
Here are a few topics I recommend you take time to learn about:
- How to safety wire fasteners
- How to safety wire rudder cables
- Torque requirements of different fasteners
- Torque conversions for using a torque wrench with an extension handle
- Strength of fasteners required in different materials
- Wire gauge required for electrical circuits by length and amps drawn in bundled and unbundled harnesses
- Electrical connections
- Types of rivets
- Hardware identification tables
- Engine systems
- Fuel systems
- Inspection of propellers
- Weight and balance
ADs & SBs
Other sources of information that you need to track are FAA Airworthiness Directives (ADs) and manufacturer-issued Service Bulletins (SBs). SBs include Critical Service Bulletins, Mandatory Service Bulletins and Service Information Letters. These can be issued by Lancair, your engine manufacturer, propeller manufacturer or propeller governor manufacturer-basically by any installed component manufacturer.
Note that ADs are NOT compulsory for experimental aircraft UNLESS the AD specifically contains wording that includes experimentals. A recent example is AD 2017–11–11 issued for NavWorx ADS-B equipment. Because of the unique nature of each experimental aircraft, ADs are not typically issued for the aircraft, but are sometimes issued for installed components, such as engines, avionics, propellers, etc. Depending on your specific installation and use of these components, such AD's may or may not be applicable to your aircraft. In the case of AD 2017-11-11, the FAA required removing the specified equipment before further flight on ANY aircraft in which it was installed.
Having established that AD's generally don't require compliance does not mean you should ignore them. As owner/operator of an experimental, you should carefully review any AD issued against the components installed on your aircraft for applicability. When you do, I'd strongly recommend you make an appropriate logbook entry that you've reviewed the AD and that you've complied, or if not, why you elected not to do so. This will save you a LOT of money in future years when the A&P performing the required condition inspection wants to charge you for: 1) the review of outstanding AD's that are un-documented in your logbook, and 2) that in their opinion, need to be complied with for continued airworthiness of the aircraft. (Note that the inspector is signing off on the airworthiness, and it's literally their call. LOBO's website, LOBO eNews and LancairTalk.net are good places to go if you want to find out about AD's that may be applicable to Lancair aircraft.
Service Bulletins are also "optional" for your Lancair, but are typically written against your specific model or installed equipment. You must assess and determine if each applies to the specific construction and/or installation in your aircraft. Note that like most ADs, these are written to correct specifically-identified deficiencies in parts, equipment or operation, so a decision not to comply should be taken carefully. If you did not build your aircraft or personally install the affected equipment, I'd recommend you seek advice of an experienced Lancair builder or your local A&P. As an example, we've had a number of Lancair owners choose not to comply with Lancair SB077-0518 concerning modification and inspection of nose gear retraction mechanisms. Several have subsequently experienced nose gear collapses. The cost for this experience typically starts at about $30,000. As with ADs, a careful review and documentation of what you did for each SB issued against your aircraft or installed components will save serious $time$ when your next condition inspection comes due.
Hiring a Pro
Another very important consideration regarding the maintenance of your aircraft is that many professional mechanics will not touch experimental home built aircraft. One reason is that no two aircraft are built the same, generally don’t have the same equipment installed, and may not have good documentation such as logbooks (both the builder's log and ongoing maintenance logs), wiring diagrams, and build manuals. The difference between experimental and certified aircraft is that the FAA requires certified aircraft be built to exacting standards which are outlined in constantly updated build and maintenance manuals accessible to maintenance technicians. Owners/operators are also required to acquire FAA approval for all modifications to the airframe, engine, avionics, etc. Such modifications require a time-consuming and costly development and testing process to acquire a Supplemental Type Certificate (STC) that must be overseen and ultimately approved by the FAA. For example, the original Beechcraft Bonanza came with bench seats. To replace the bench seats with individual seats that could be independently moved forward and backwards required an STC. This kind of standardization in maintenance documentation makes it fairly easy for an experienced technician to work on any aircraft, even ones they've never worked on before.
There is no STC process required to modify an experimental aircraft. You can change your seats from the original build, install an air-oil separator on the engine, install a remote oil filter mount on the firewall, install winglets, install air conditioning, add a parachute, or even install a new door, all with no approval from the FAA required. For most experimental aircraft, the operating limitations issued with the airworthiness certificate spell out what you must do to make modifications, which in some cases may require flight testing. And although all modifications require log book documentation and re-computation of weight and balance (if necessary), some owners are either not cognizant of these requirments, or are simply lackadaisical about following them, which often leads to inaccurate and/or incomplete maintenance documentation. The bottom line is the flexibility (with some limitations) you enjoy in modifying your home-built Lancair comes at the cost of standardization, and that's enough for some maintenance pros to avoid working on experimental aircraft.
What About Tools?
So you got some tools last year under the Christmas Tree or on Father’s Day. Are those good enough for maintaining an aircraft? The short answer is maybe. Some tools are so poorly made they can cause injury to the user or damage to whatever you're working on. There are a lot of reasons some cars may cost more than others, but it usually comes down to performance and reliability, which are both related to build quality. Tools are much the same. Do you need to buy from top-shelf vendors like Snap-On or Mac Tools, or will Kobalt, Craftsman, and no-name tools from your local auto parts store suffice? Actually, the mid-priced tools from big-name hardware stores are pretty good; some are even backed with a lifetime warranty.
So what's the difference between the cheap, discount-store tools and mid-priced, brand-name or top-of-the-line "professional" tools? First, quality tools use better metals. You will not bend or break them easily. Quality tools also have a better finish to withstand abuse and rust. And because their upfront cost is so high, companies like Snap-On will offer parts to fix or refurbish broken or worn tools.
Cheap tools are made using lower quality finishes, and softer metals. That means they wear and corrode more readily than better-made tools, but more importantly they bend more easily, losing their grip on fasteners. If you have worked with tools at all you'll have noticed they sometimes slip and cause damage (rounded off nuts/bolts/screws). That can be poor user technique, but more often it's a worn tool that no longer grabs the fastener properly. When a cheap tool becomes worn it's usually not worth refurbishing. Also, manufacturers of cheaper tools sometimes don’t consider ergonomics, such that using them can be painful.
There are other differences that might make paying more for a tool worth it, such as a ratchet with a higher tooth count. More teeth on the ratchet mechanism allows use in tighter spaces. Ratches with fewer teeth can require more than 15 degrees of swing arc to engage the next lock, where ratchets with more teech can be operated in as little as 5 degrees of arc.
What about place like Harbor Freight that specialize in "cheap" tools? Some of their tools are certainly cheap, in every meaning of the word. But some are great, and I have a number of them myself. The ICON line sold at Harbor Freight can give Snap-On a run for its money.
Also don't overlook the used market. Used tools from top-shelf manufacturers may be purched for a fraction of their new prices. You might also find a deal from your local Snap-On, Mac, or Cornwell truck drivers on repossessed tools (mechanics not making their payments) or trade-ins. You can get some really great pricing, and the lifetime warranty still applies.
A word of caution: Don’t get suckered into buying a whole tool set. Although the prices often seem too good to be true (342 tools!), these sets often contain tools you will likely never need. I posted a beginner tool list at LancairTalk to get you started. Oh, and don’t forget shop supplies such as latex gloves, paper towels and hand cleaner. You will use a lot of these consumables!
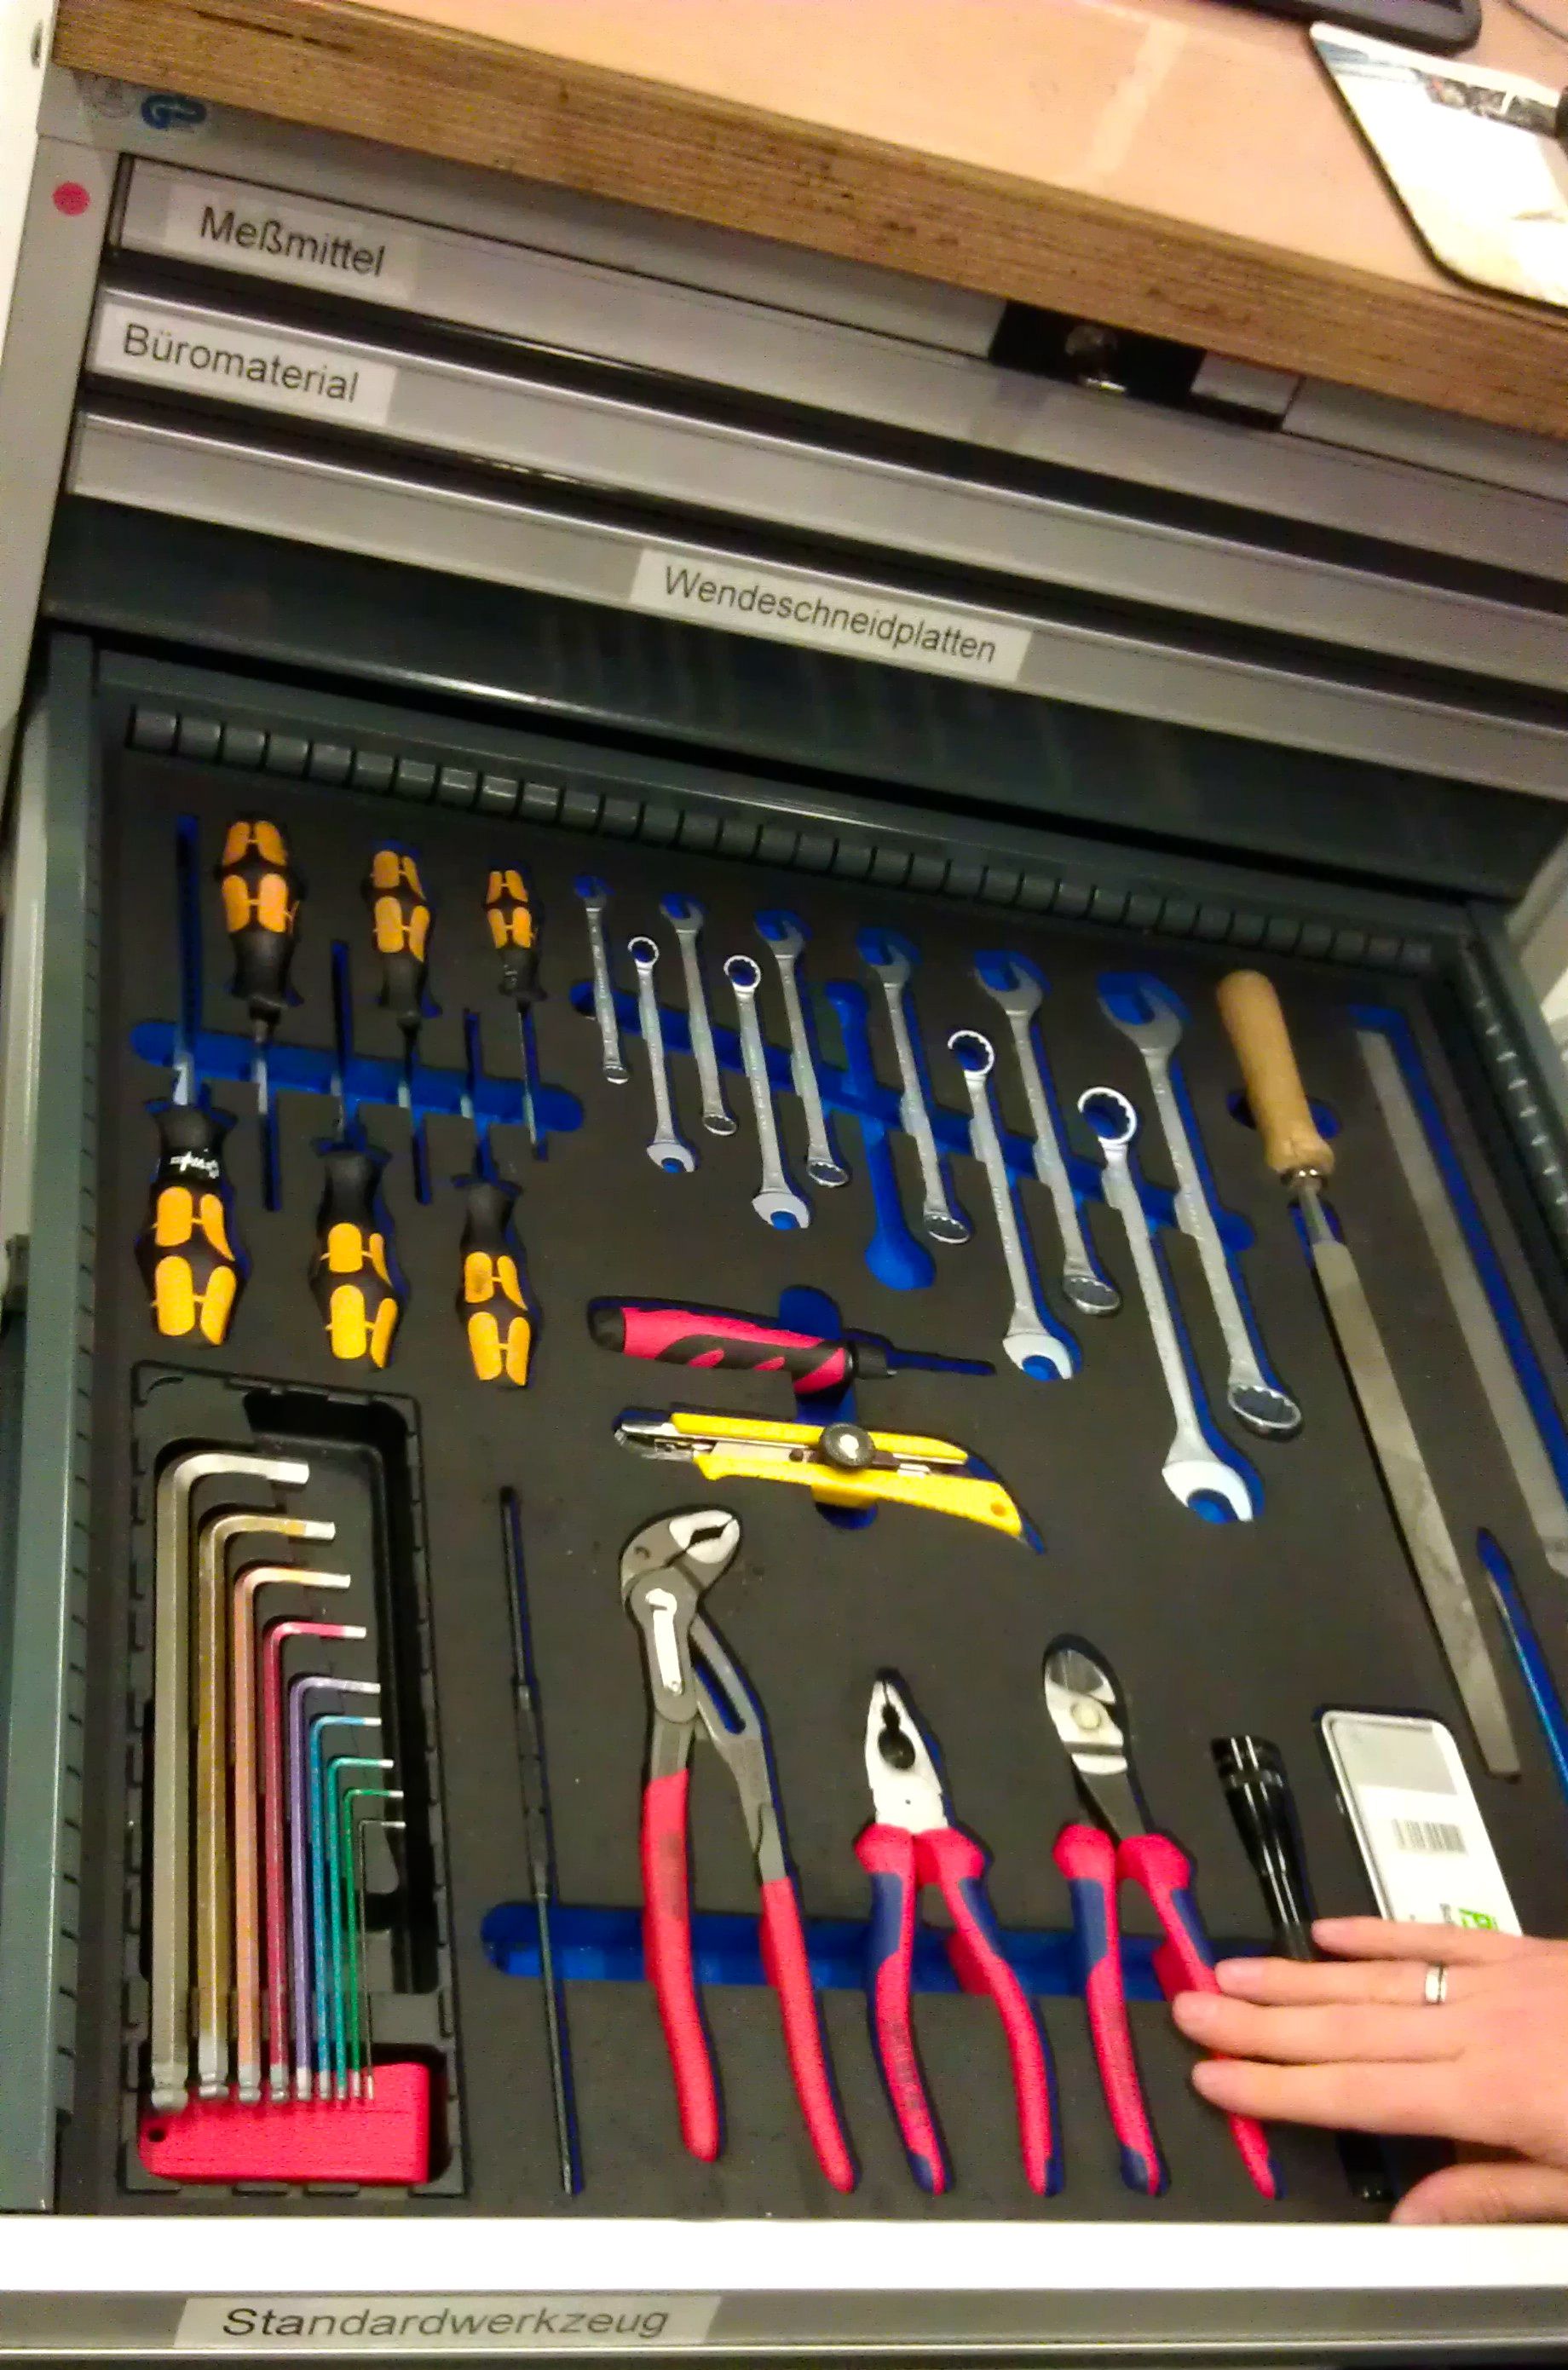
Keep Organized
At the end of any maintenance task, gather your tools and put them away. If that's not practical, at least check your tool box at the end of the day to make sure all your tools are in it. Try to keep your tool box organized to make it easier to see when something is missing. Many pro shops require tools be kept in a shadow box like the one pictured at right. This makes it very easy to see when a tool is missing. A daily tool inventory will help you avoid leaving a tool somewhere in the plane—behind a panel, or under the cowling perhaps—where it could jam a flight control or cause engine damage.
Hardware
In the tool list I posted at LancairTalk, I also listed general hardware you should have on hand. If you do any work on your plane you will need various bolts, screws, washers, nuts, cotter keys, etc. You can get an idea of the sizes you'll need by looking at the parts list included at the beginning of each chapter in the build manual for your aircraft. If you don't have a build manual why are you even considering working on your plane without one? Kidding aside, you can download a PDF copy at www.lancair.com.
Since many will need to be replaced over time, your hardware supply should include a few of each type of fastener used on the aircraft. In fact I carry some of each for the cowling, wheel pants, and access panels in my travel spares kit (see below).
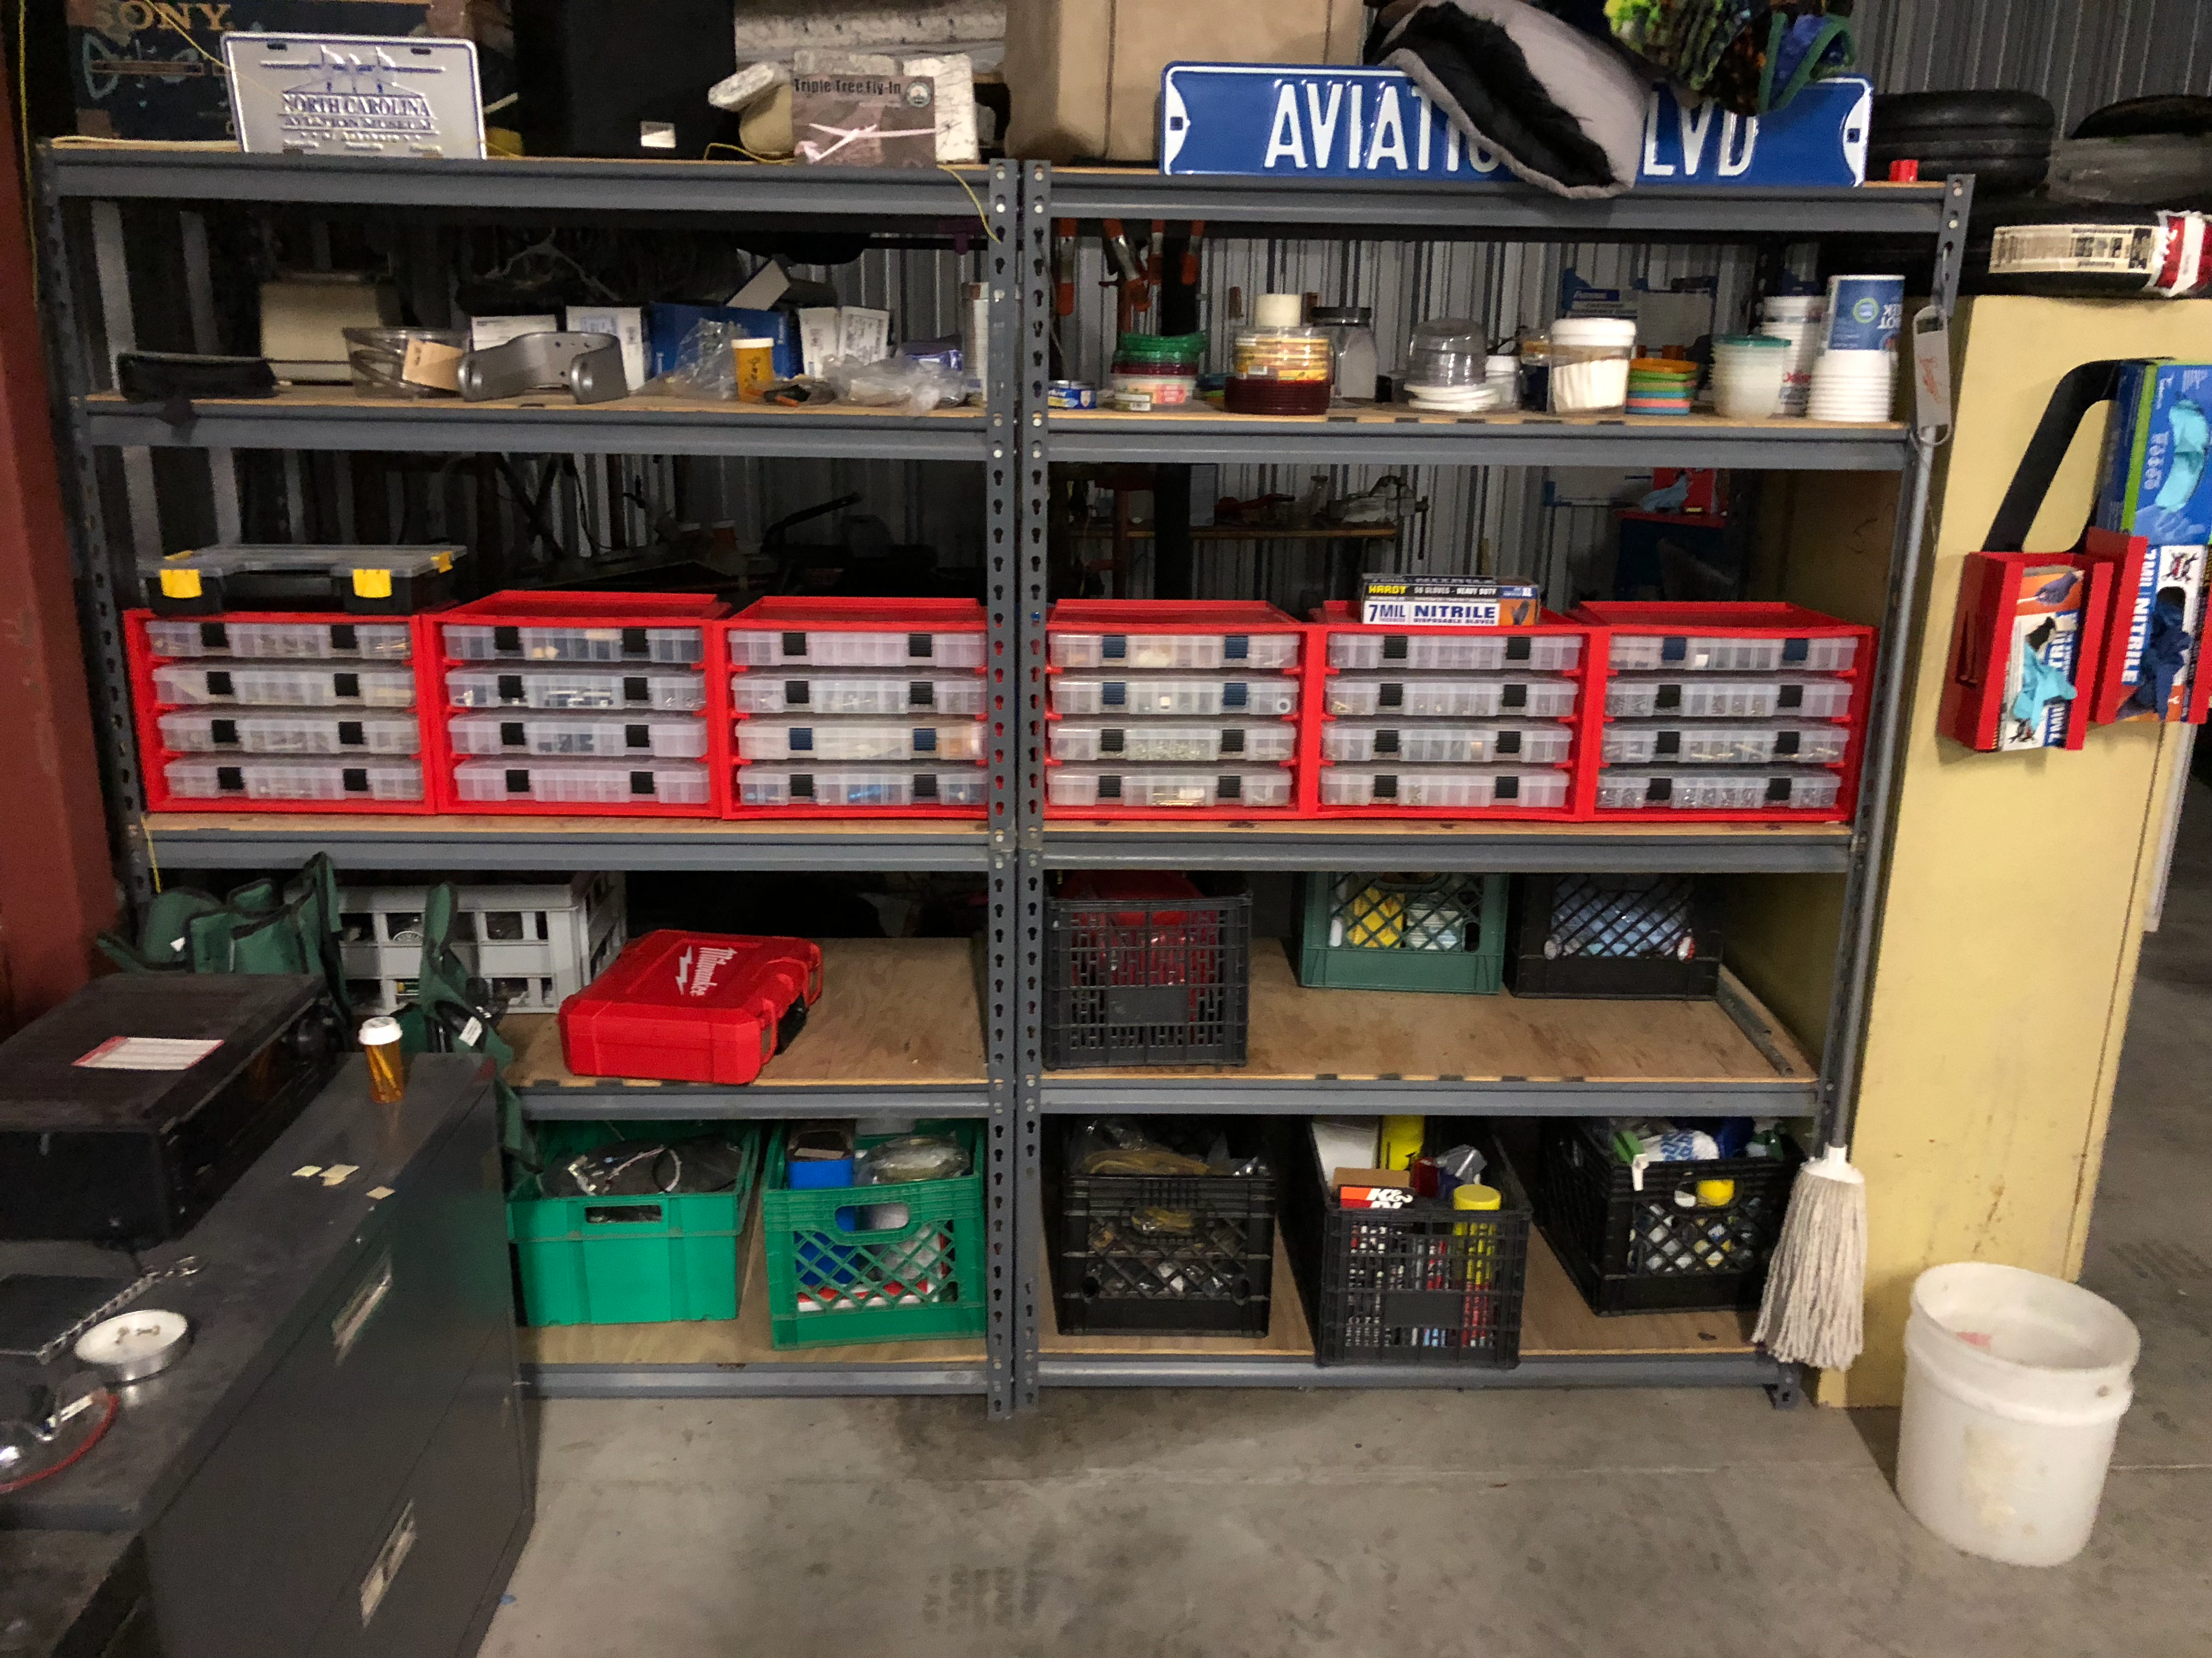
Don't forget to keep organized. Leaving a bunch of bags of hardware lying about your shop is a recipe for wasting a lot of time! Figure out what type of storage you want for your hardware as it can get out of control quite quickly. Lancair included stackable Conteco bins like those in the image to left (click to enlarge) with the kits they sold. I have a bunch of these; they make life much easier with all the little compartments. You can order them on Amazon.
A Word About Quality

You can get almost all of the hardware you need in the aviation aisle at your local Home Depot (haha), but should you? Aviation grade hardware is expensive to be blunt. Is it worth it? Aviation grade hardware is usually more durable than typical hardware store products, but does that matter if it's a non-critical (non-structural) application? Maybe not, but you and your passengers are relying on all the hardware in the aircraft to function correctly. The failure of even a non-critical component can cause distractions and delays, and force a pilot to make choices between safety and mission. Why put yourself in that position? Further, since aviation hardware is much more corrosion resistant than typical hardware you'll have to replace it less often, which is a big deal in hard-to-reach places.
The image at right (click to enlarge) is a copy from the online catalog at www.aircraftspruce.com. Look in the top left corner and note the minimum tensile strength is 125,000 psi. Compare that to your local hardware store’s offerings. Note that stainless steel is not always better. Your initial inspection of your new plane should include close scrutiny of all hardware on the plane. If it's not aviation-grade replace it!
Logbooks
There are so many things to keep track of on an airplane compared to a car or motorcycle. Some of us keep track of maintenance on our cars but I have seen much less tracked on airplanes. Documentation of maintenance, modification, repair, equipment replacement, etc. on every aircraft is both an FAA requirement and common sense. What pilots don’t realize is that keeping accurate and detailed maintenance and inspection records actually benefits them in important ways. One is resale. I would argue that good maintenance logbooks are a significant portion of the value of an airplane. If you have seen the horror stories of log books that are lost for certified airplanes being sold, you would understand. Many professional maintenance shops sign for aircraft logbooks and store them in fireproof safes.
Logbooks also provide a history on what’s been done to the airplane. Think of how helpful (essential?) it is to know if or when the magnetos were changed, what avionics were changed, what ADs were complied with, etc. Accurate and detailed logs can provide evidence for a seller's claims about changes/upgrades to avionics. An aircraft lacking documentation for required inspections such as altimeter, transponder and ELT is unairworthy. Be sure that anyone performing any work on your airplane document it in the appropriate log book(s). You can also document this yourself; an A&P license is not required to make such entries for experimental aircraft.
One Log or Many?
What logbooks should you have? It's up to you, but most owners divide their logs into four major categories: Airframe, Engine, Propeller, and Avionics. These can be individual logbooks, or divisions of a single log. The airframe logbook is for documenting the completion of the build, structural repair, inspections, flight control repairs, weight and balance, and any major changes to the basic airframe. The engine log covers the engine (duh), but should also document work on the propeller governor, alternator and starter. The propeller log details inspection and repair on prop blades, the hub, etc. The avionics log is reserved for work on radios and other avionics such as the transponder, ELT, and EFIS/MFD equipment.
What Should Be Logged?
Everything permanently installed in the aircraft such as oxygen systems and air/oil separators should be documented in the logbooks. This includes equipment installed using a supplemental type certificate.
What's the Best Kind of Logbook?

Logbooks are available in a variety of formats, including fancy hardcover bound to softcover bound books. There are a few vendors offering to maintain aircraft logbooks online in an electronic format. This option can reduce the likelihood of losing your aircraft logbooks, the the service isn't free. Some owners develop their own record-keeping methodology. If you choose that option be sure you do it legally The FAA outlines maintenance record requirements in AC 43-9C, which you can read by clicking here.
I personally keep all maintenance records for my aircraft in a large 3-ring binder (click to enlarge image to right) divided into major categories. I had a former FAA maintenance inspector review my binder and said that it was a good idea to combine them all. I print out customized maintenance and logbook sheets on my computer and add them when I need them. To make my log complete I cut pages from the original bound log books and glued them onto 8-1/2” x 11” pages and inserted them ino my binder.
Traveling Maintenance Kit
Let's say you and your family have landed at a seeminly abandoned airport in the Californian desert. As you slide off the wing you notice your left wheel pant is sitting crooked. Congratulations...you’re now a mechanic! The first thing you have to do is decide whether you'll make a repair, or fly it somewhere to get it repaired. If you fly it you risk loosing the whole wheel pant and maybe causing damage to the gear leg fairing. If you have a 9/16” wrench, or at least a crescent wrench, you can easily tighten up the mounting bolts.
Another scenario is you land at an airport with a maintenance facility—yay!—but the mechanic on duty will not work on experimental aircraft for perceived liability—bummer. Did you bring the right tools? I carry a traveling maintenance kit for just such scenarios.
Tools:
- 1/4” drive socket set
- Screwdriver with a variety of tips (flat head, Phillips sized 1, 2, and 3, and torx bits)
- Wrenches: 1/4” – 5/8”
- Crescent wrench
- Allen wrench set (note: 7/64” will pull most avionics from the panel)
- Variety of pliers (plain, adjustable, needle nose, vice grips, etc.)
- Safety wire pliers
- Diagonal cutters
- Jewelers screwdriver set
- Battery maintenance charger
- Jumper cables (I have a 14V system and thus can be jumped by a car if need be)
- Emergency door latch kit
- Funnel
Spares & Consumables:
- Sizes 6, 8, & 10 screws and washers for cowls and access panels
- AN3, 4, and 5 bolts, nuts, and washers
- Inner tubes for nose and main tires (unless you use tubeless)
- 2 quarts of oil
- Electrical tape
- Zip ties
- Safety stored in a medicine bottle with a hole in the cap to pull it out
- Window cleaner
- Porta pee packs
- Paper towels
- Latex gloves
Other:
- Tie down ropes and rings
- Grass tie down kit (if flying to a grass strip)
- First aid/survival kit
A note about the first aid/survival kit: You never know when you might have to land off airport, and if you frequently make long cross country flights you might find yourself out in the boonies with injuries precluding walking to civilization. Along with basic first aid gear, I carry survival equipment such as a temporary shelter, water, tools to make a fire, a personal locator beacon, rope, flashlights, and signalling devices like a strobe light, a signal mirror, etc. You can’t be safe enough.
Good luck and feel free to contact me or LOBO is you have suggestions to improve this guide.
For questions/comments on this post contact George via email: info [at] lancairowners.com.