
Control Surface Hinges Have a Tough Life
 by mark sletten
A recent thread over at LancairTalk about the spherical bearings used for elevator hinges in the IVP got me to thinking. While thinking for me often causes confusion—and occasionally danger—sometimes it yields benefits. The author of the original post on this thread claimed he had to replace the spherical bearings used for the right-side elevator on his IVP every 125 hours. LOBO member and well-respected LancairTalk poster Chris Zavatson pointed out the Aurora COM-4T bearings supplied with Lancair kits are made using low-carbon steel, which is likely the reason for the short service life. Chris said he had replaced his elevator bearings with a product comprised of higher-quality alloy steel, and with regular lubrication had gotten 17 years of service from them.
The bearings on my elevator were the original supplied with the kit, and they were very stiff. Stiff enough that I could not turn the inner ball in the race by hand, even after liberal application of several different kinds of lubricant. The bearings were so stiff that the elevator was not free floating, which always bothered me. It seems like the bearings should offer no significant resistance to elevator movement. So, between my concerns about the original bearings' stiffness and Chris Z's revelation that they are not as durable as they might be, I had all the reasons I needed to replace them. Besides that, there was a low ceiling and five inches of snow in the forecast (which explains the stupid hat), so what else did I have to do?
Research
The first thing I had to do was get some bearings. Chris said he had used Heim LHA4 bearings. You can get these from Aircraft Spruce for $50 buck a pop, or from Applied Industrial for $40. While viewing the page at that link I noticed Applied listed "alternate" products from other manufacturers. One of these is the SBG 4S bearing from Sealmaster. It has almost identical specs to the Heim bearing, but at only $32 each. After poking around on the web I couldn't find anything to suggest Sealmaster sells inferior products, and since Applied didn't have five of the Heim bearings on hand, I ordered five of the SBG 4S variety. After shipping and tax, the total came to $180.
More Time in the Shop
The first thing I had to do was remove the elevator from the plane. Piece of cake; I've had the thing on and off a dozen times in the past year.
Next, I had to explain to the House Appropriations Committee Chairperson (otherwise known as Commander-in-Chief, House) why we had spent $180 to replace "new" bearings. Considering I had just finished building the plane last month, she had a point. This was after she walked into the shop and saw the elevator removed from the plane. During the build process I was never able to adequately explain to her why I had to REMOVE parts from a plane I was supposed to be ASSEMBLING. So naturally, she questioned my decision—based solely on the word of "some guy on the internet"—to remove the elevator AFTER I had completed flight testing and deemed the aircraft airworthy (again, she had a point—she's the committee chairperson for good reason). After I mumbled something about bearing durability, elevator stiffness, saving work in the future, and Chris Z.'s engineering credentials she seemed mollified if still somewhat suspicious.
At that point, all I had to do was figure out how to remove the bearings from the hinge brackets. Normally, this would be done with a fancy press tool. But the recent discussion about $180 bearings with the Committee Chairperson suggested successfully justifying the acquisition cost for such a fine tool was unlikely. Luckily, you don't really need one for this application. All you need are a couple of appropriately sized sockets, and a bench vice. Here's how you do it.
Poor Man's Press
Find a socket large enough to sit against the face of the hinge bracket without touching the bearing. Hold the socket against the hinge bracket and look inside to make sure you have clearance all around the bearing, especially if your sockets have six instead of twelve points.
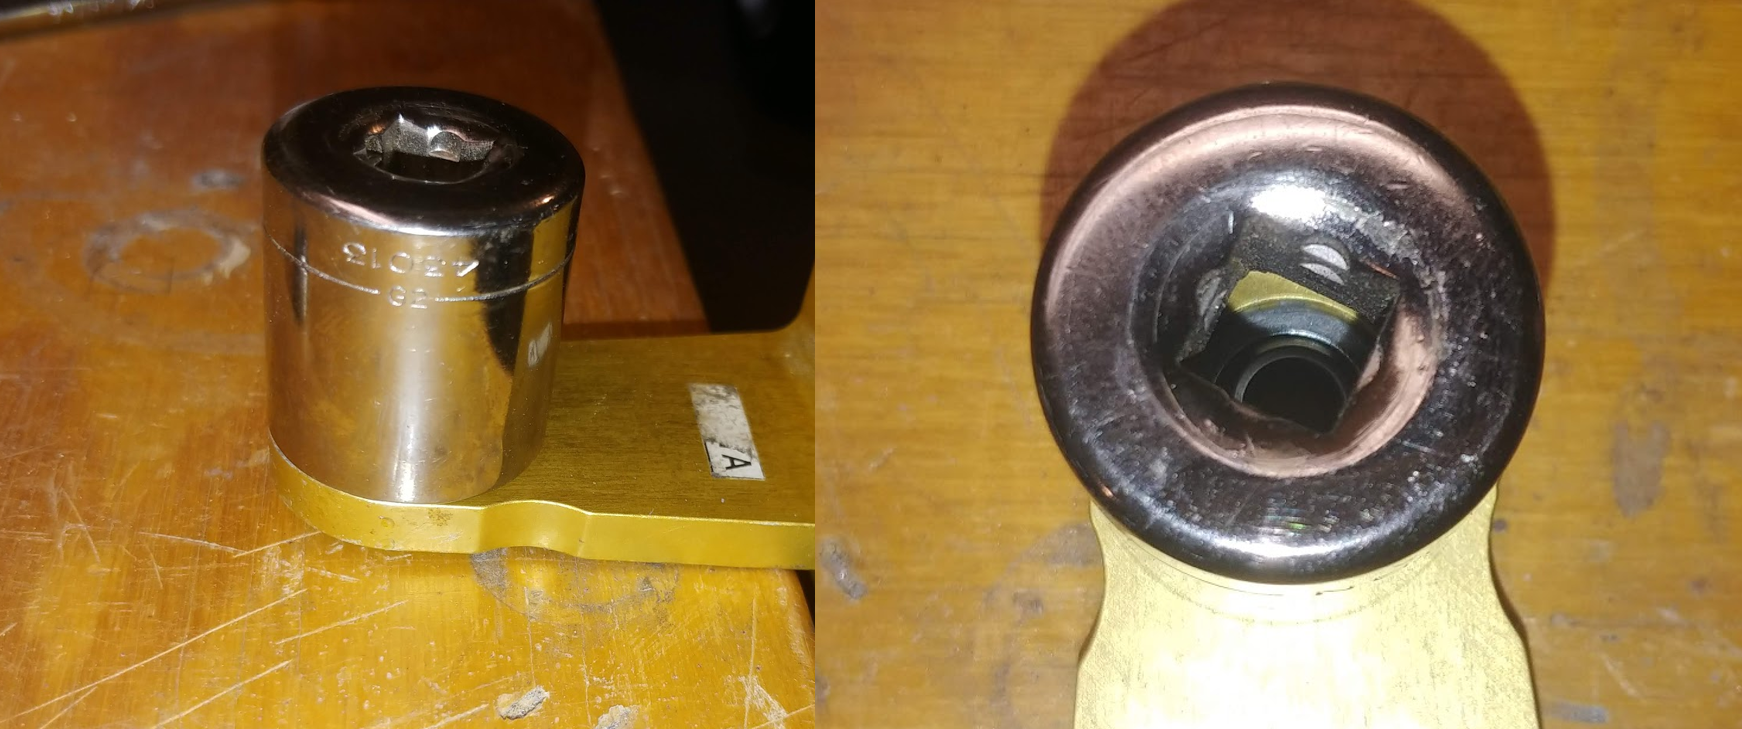
Then, find a socket to sit against the bearing race without contacting the ball. The socket also has to be small enough to pass through the bearing mounting hole in the hinge bracket (for reasons that will become apparent).
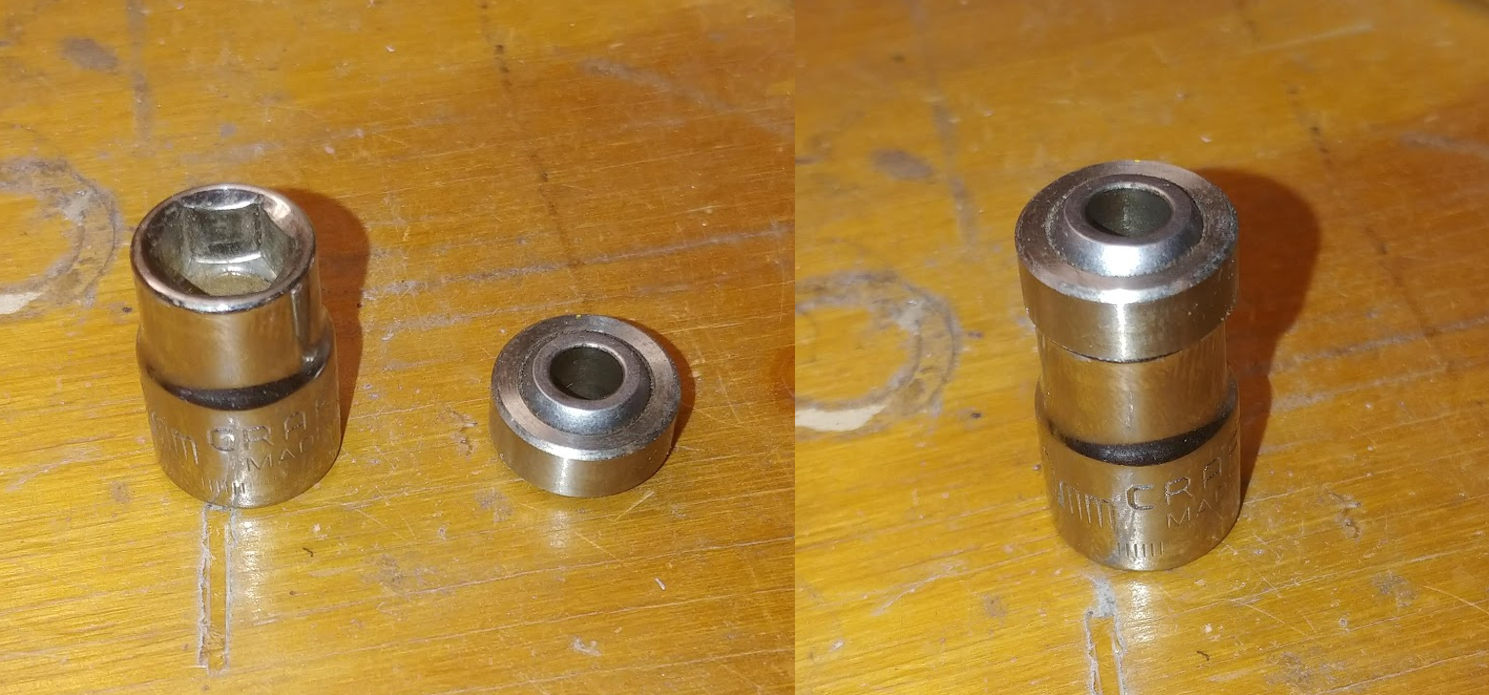
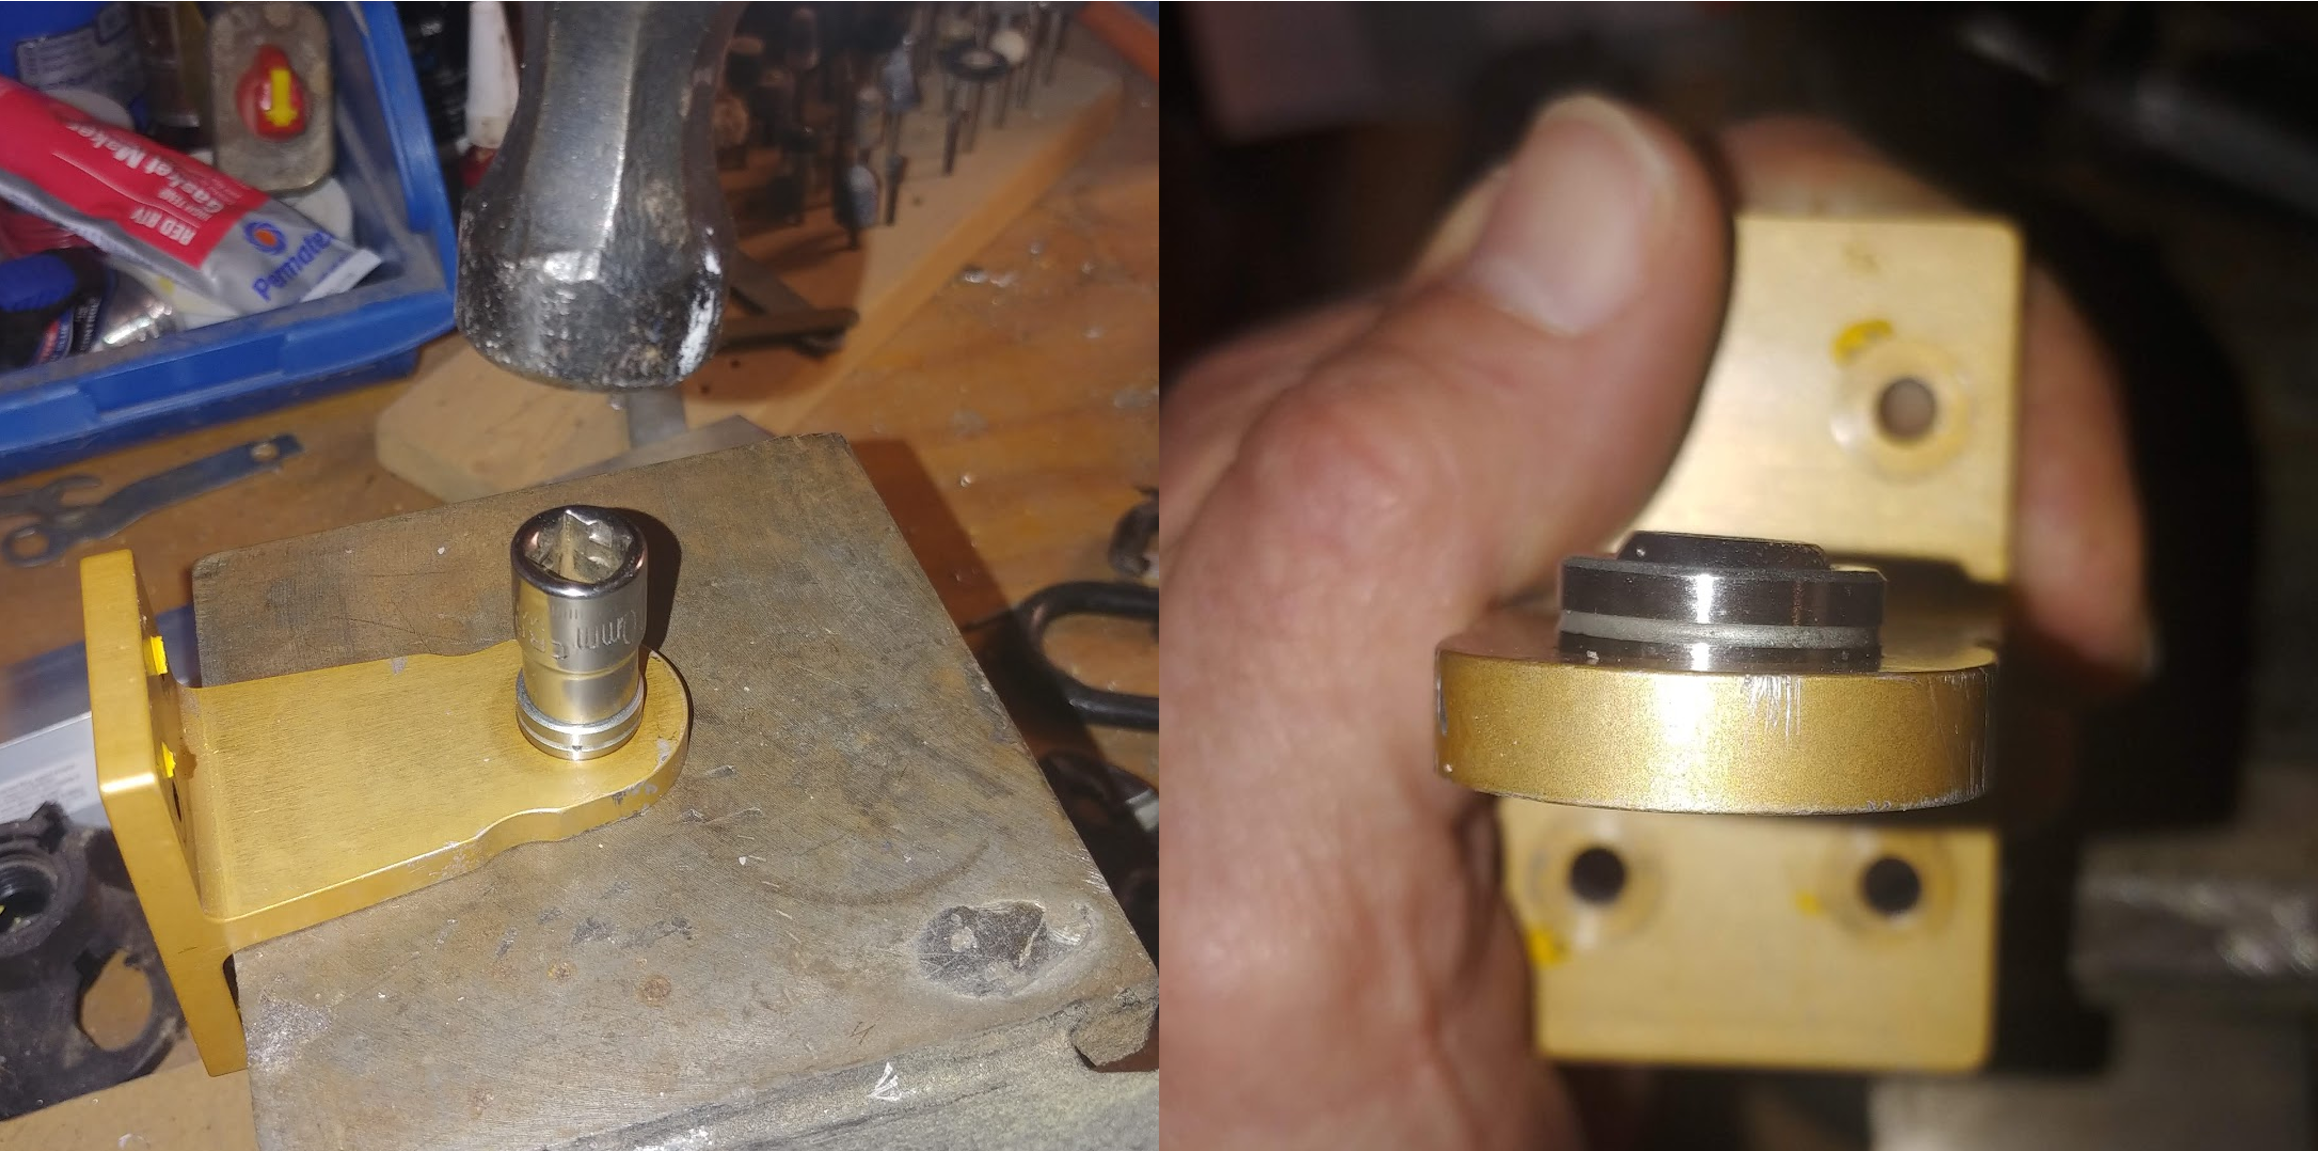
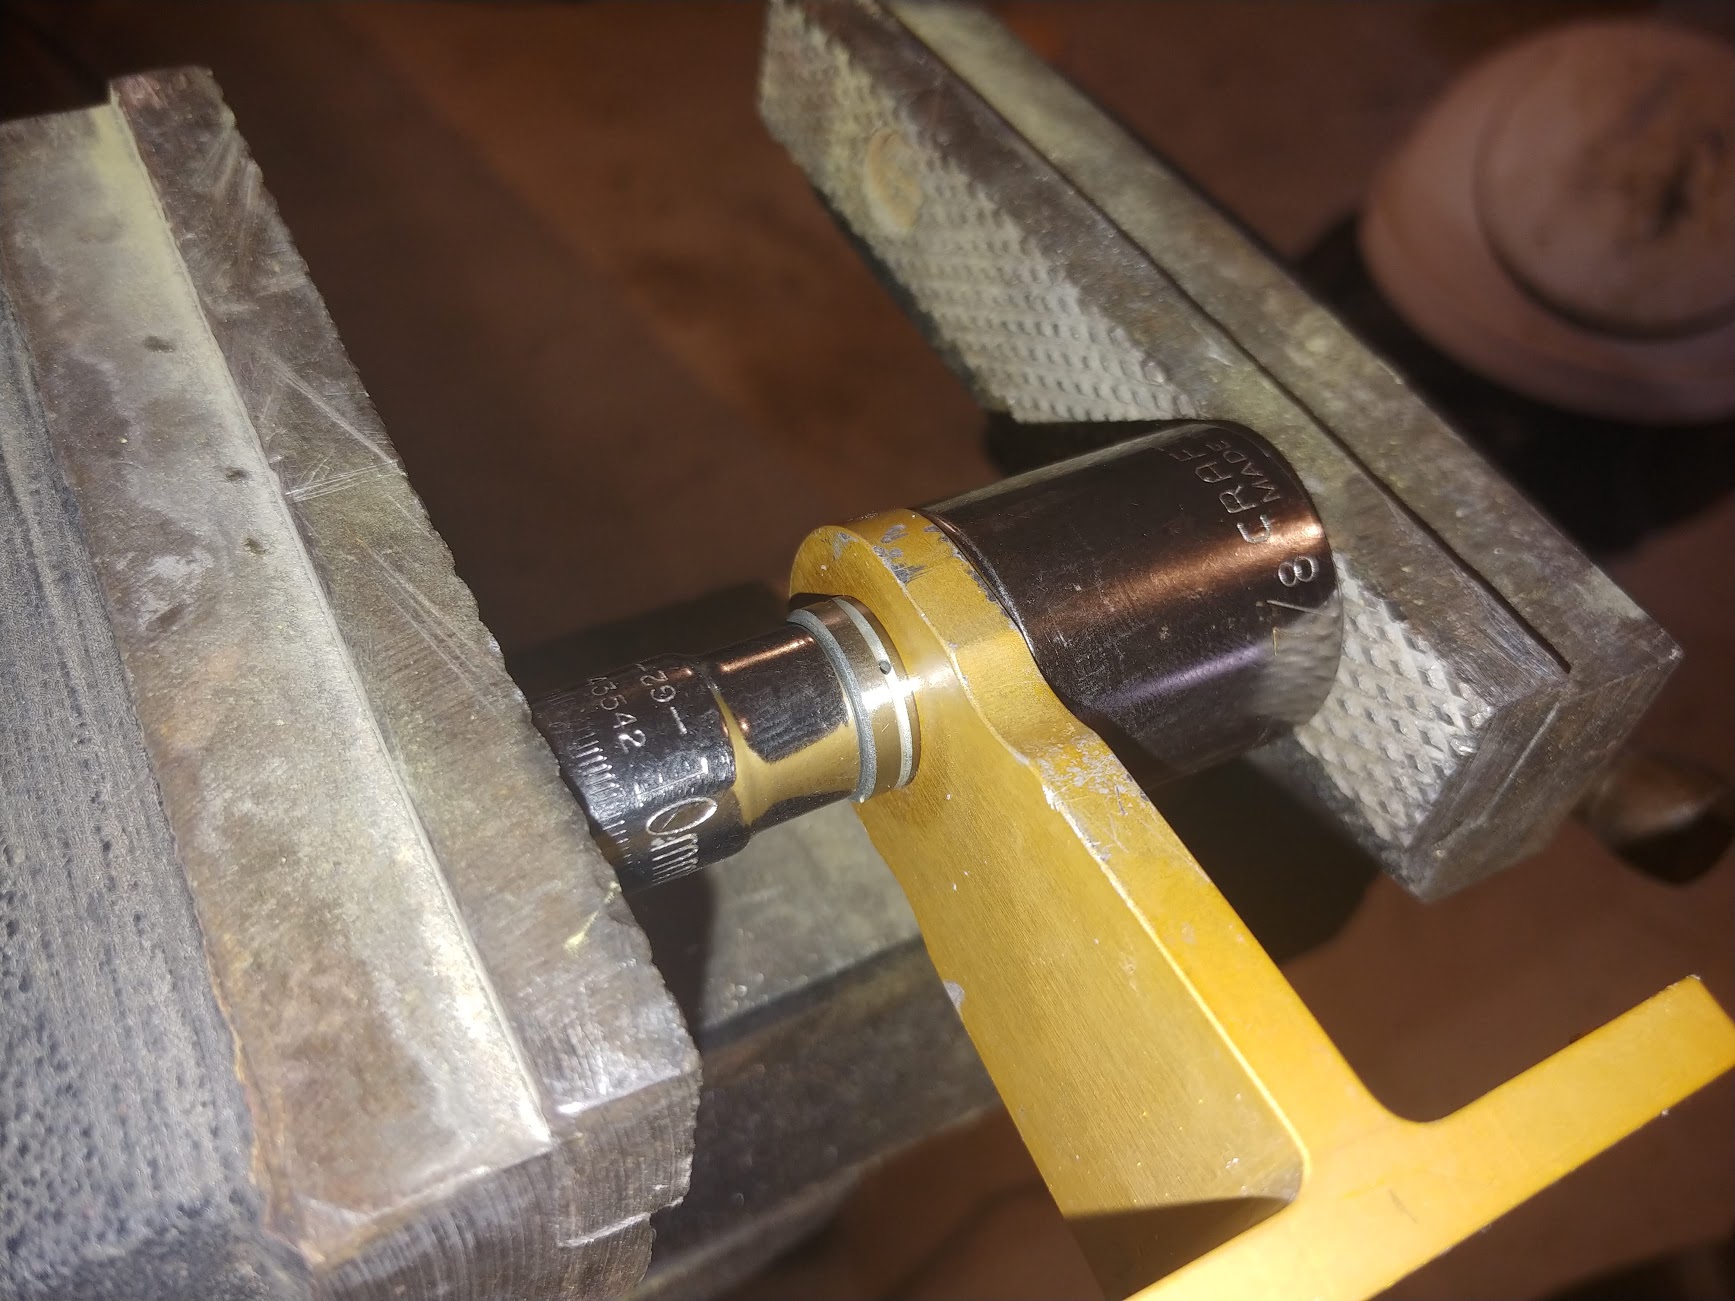
Align the small socket with the bearing race and the large socket against the hinge bracket, then get everything between the jaws of your bench vice. A few turns of the vice handle and the bearing will pop right out. Pay attention to how much force is necessary to force out the bearing.

NOTE: You can destroy your hinge brackets with a bench vice! If you have made a half turn or so on the vice handle and the bearing hasn't started moving then check everything very carefully. Make sure: 1) there is no interference between the bearing and the inside of the larger socket; 2) there is enough clearance in the hinge bracket for the smaller socket to pass through; and 3) everything is perfectly aligned.
With the old bearing out, it's time to press the new one in. I started by lightly tapping the bearing into the hinge bracket before going back to the vice. Make sure the bearing is seating evenly.
NOTE: Tap lightly! You can destroy that expensive bearing by beating on it with a hammer. You might be tempted to just keep tapping to fully seat the bearing in the bracket. Don't do it!
After you're satisfied the bearing is seating evenly go back to your makeshift press. Align everything in the vice again, then turn the vice handle until the bearing is fully seated. Remember how much force you needed to press the bearing out? You should use about the same force to push the new one in. If it's taking significantly more force stop! Make sure you are using the proper bearing size, and that there is no interference between the sockets, the bearing, and the bracket. Then make sure everything is properly aligned. If it requires significantly LESS force, make sure you are using the proper bearing, and inspect the bracket to make sure it isn't damaged or worn. If the bracket is damaged or worn you may need to purchase a replacement.
Lubrication
As Chris Z. noted in his post, the key to getting long life from these bearings—any bearing really—is proper lubrication. I applied a liberal dose of wheel bearing grease before reinstalling the hinge brackets on the plane. You may have noticed the ring around the outside of the bearing race with the hole in it. This is a lubrication groove. I thought briefly about drilling and tapping the hinge bracket for a grease fitting to facilitate annual bearing lubrication, but it's not thick enough, and the fitting would likely interfere with elevator movement. I believe an annual application of good quality spray such as LPS 2 Heavy-Duty Lubricant should be adequate. You can always apply it more often if you fly in the rain or operate in hot and dusty environments.
Aftermath
Elevator movement with the new bearings is completely free of the previous stiffness. After the next few flights I plan to carefully inspect the bearings to make sure there is no unwanted movement between the bearing and the hinge brackets (I've used torque seal to be sure). I'll also carefully check for bearing play. If all goes well, I expect many years of service from these bearings. If not, someone (Chris?) will have to do some 'splainin' for the committee chairperson.
For questions/comments on this post contact Mark via email: m.sletten [at] lancairowners.com.