by Don Gunn
 Click for full size
Following recent work on my aircraft, the pressurization system could not maintain a pressure differential above 2 psi—not good. I purchased my IV-P about four years ago when it had only 100 hours total time on it. Even then it would only maintain a pressure differential of about 3.7 psi, which while not ideal is much better than 2 psi.
I've experienced a few previous pressurization problems in the past traced to leaking SCAT hoses. These made for easy repairs. This one was not so easy to diagnose.
With the help of Jeff Michaels, owner of Jet Stream Composites, we found several small leaks around various tubes, cables and wires where they passed through the cabin—fuel lines, A/C lines, engine control cables, etc. We found the leaks by pressurizing the cabin with exhaust air from a large shop vacuum connected to the mixing valve on the firewall. We then sprayed a soap solution onto suspect areas—bubbles show where the leaks are.
After hitting all the areas we located with silicon sealant the system achieved a max differential of 2.7 psi with both cool and hot mixing air valves fully open. Although better, this is still not very good. What’s worse, even at high altitude the cabin was like an oven with the hot air full on. Closing the hot air mixer dropped max differential to 2.2 psi.
I knew I had a leak (or leaks), but we could not figure out where else to check. The door seal seemed fine and the mixing valve also showed no sign of leaks. We knew we had only tested the easily accessible areas using the soap bubble method; the many remaining difficult-to-see-much-less-access areas around the outside of the cabin would require another leak detection method.
Bob Pastusek mentioned to me that another IV-P owner, Dico Reijers, had tried using a smoke/fogging machine with some success. I called Dico and learned that he’d had success with a smoke machine of a type designed to make your Halloween display look spooky, or the lasers in your basement disco look cool. (Everyone has a basement disco, right?). Dico said he found so many small leaks using the smoke machine that his real problem was how to seal up such large areas, and he’s still is not getting the pressure differential he should have.
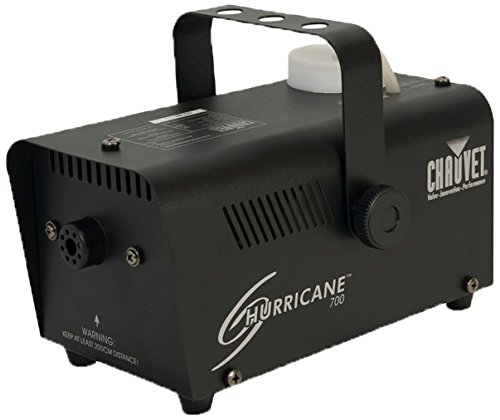 I thought this was a pretty neat idea (plus my home disco badly needed some more flash), so I bought a Chauvet Hurricane 700 fogging machine from Amazon for about $40. The device came with a water/glycol fluid which it heats to create a dense fog in a matter of a minute or two. Available safety data indicate breathing the fog should not be harmful to humans, although some people report throat/lung irritation.
When Jeff and I did the earlier shop vac test with the soap bubbles, I sat in the cabin so I could inflate the door seal while Jeff used the soap. Other than a little ear popping, this was fine, but I was not so sure I wanted to sit in a fogged up cabin breathing "fake" smoke for several minutes. I considered using my oxygen tank or a scuba tank and mask while sitting in the cabin (would have made for some good pictures!), but opted for Dico’s technique instead. He used a piece of monofilament fishing line attached to the door seal switch to activate the door seal from the outside of the cabin—that Dico is a clever guy!
The Procedure
So here are the steps we followed:
- Take off the top cowling and disconnect the battery cable.
- Connect a shopvac (with the hose on the shopvac’s exhaust side) to the mixing valve.
- Take out the back seat and completely tape shut (we used overlapping shipping tape) the top of the well in which the Dukes controller sits (the blue anodized unit which controls the cabin pressure).
- Devise a means to actuate the door seal inflation pump toggle switch from outside the aircraft with the door closed. With the switch in the on position (the battery is disconnected, so the seal will not inflate), we slid the barrel of a ball-point pen over the toggle (for increased leverage) and crimped a 20 lb. test monofilament line to it. We ran the line out the top, front of the door frame and taped it to the windshield to keep it outside the cabin until we latched the door (not now, Step 7).
- Place the fogger in the cabin, turn it on, and arrange the fogger’s power cord to close the door as much as possible (be careful not to damage the door seal).
- Let the fogger run a minute or two. It needs to reheat the fluid after about a minute, so two cycles of fogging will fill the cabin really full of dense fog.
- Unplug the fogger and quickly toss its power cord into the cabin. Close and latch the cabin door with the outside handles.
- Have your coworker (or disco partner) apply power to the battery to inflate the door seal.
- Turn on the shopvac to pressurize the cabin and look for smoke coming out of the cabin (bright flashlights help). Look everywhere: in the engine compartment; around the door seal; in the baggage compartment; and in the landing gear area. Hopefully, you will find only one or two areas with fog collecting.
To find all the leaks you may have to repeat these steps several times; the cabin clears of fog in just a minute or two. To refill the cabin with smoke just pull the monofilament line to deactivate the door seal (cool) and start over at Step 1 (remember to pull the battery and to flip the door seal pump switch to the on position each time).
The Happy Ending
We found a large apparent leak by the left wing root, so large that smoke was even drifting out of the speed brake area. Try as we might we could not see exactly where the leak was; the fake fog was thick enough to obscure its point of origin, damn!
 We then moved the vacuum hose to the suction side of the shop vac, and moved the fogger out of the cabin. I got inside the cabin, removed the side panels on the left side of the aircraft, latched the door and inflated the door seal. Jeff switched on the shop vac, essentially creating a vacuum inside the cabin (your ears will pop). He then directed fog around the left wing root (we put the flaps down to give more access). Voila! I could see the fog entering from beneath the box enclosing the aileron linkage where it exits the cabin. Using an inspection mirror we observed a hole approximately ¼” in diameter. It appeared the hole had been previously patched, but the patch had failed. We removed a few panels to gain access, then sealed the hole with silicon. The next day on my test flight I had 4+ psi at 17,000 feet! Frankly, without the fog I do not know how we would have ever found this very well hidden leak.
(Consider using 3M™ Aerospace Sealant AC-236 Class B—formerly known as Proseal—instead of silicon. Silicone will not stick to itself, so future repairs are problematic. 3M’s product—available at Aircraft Spruce—sticks to itself with no problem—ed.)
By the way, I highly recommend Jeff and Jet Stream Composites. He’s located at Front Range Airport just outside of Denver. He can help you with anything from building a Lancair from scratch, to mods/repairs and conditional and pre-buy inspections. He has been building composite aircraft since 1999. He’s built ten Lancairs including three 360s, two ESes, three Legacys, and two IV-Ps. He’s also completed turbine retrofits. I can attest to work that is always done right the first time; he is truly a perfectionist and his rates are very reasonable. He can be reached at 720-371-3013.
Contact Don at don.gunn [at] att.net for question and comments.